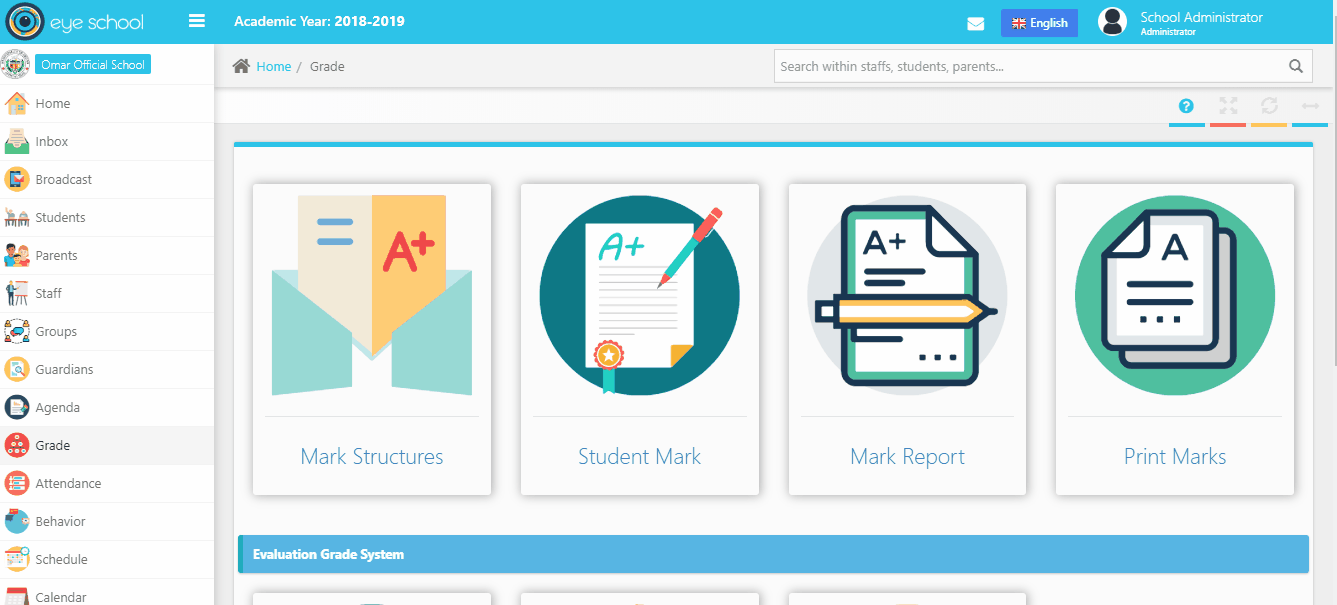
This page explains class mark structure in each class, divided in two tabs (Terms – Courses) which each one has many steps to define it.
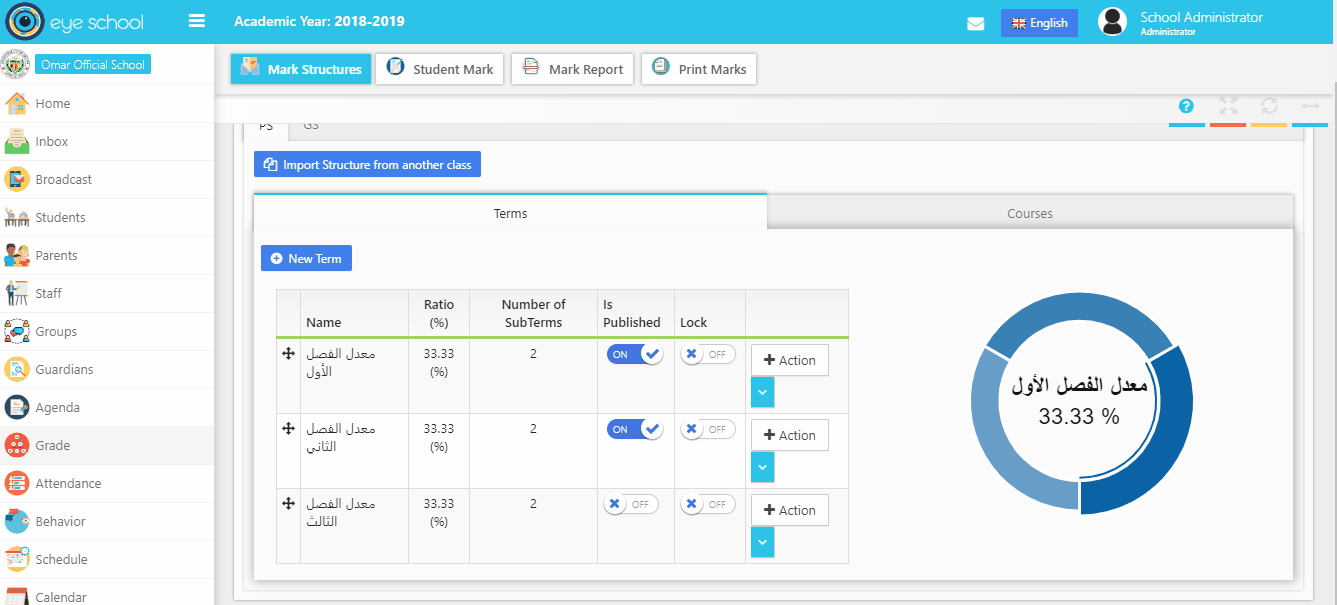
1- Terms Tab
This Tab contains structure of the terms in each class and it can create new and edit each one, however user should be careful about the total main terms ratio that should be equal to 100%. as well when he deletes any term it will delete all marks related to it.
Steps and cases for using class mark structure page:
1- First step you should define many terms in each class using (new term) button in tab terms, which will display new window to add name of the term, ratio and define sub-terms if you need to divide main term into many sub-terms. The sum value of ratio in each sub-term should be equal to the ratio of main term.

2- You can arrange the terms as you want using the plug in (plus button) next to each term
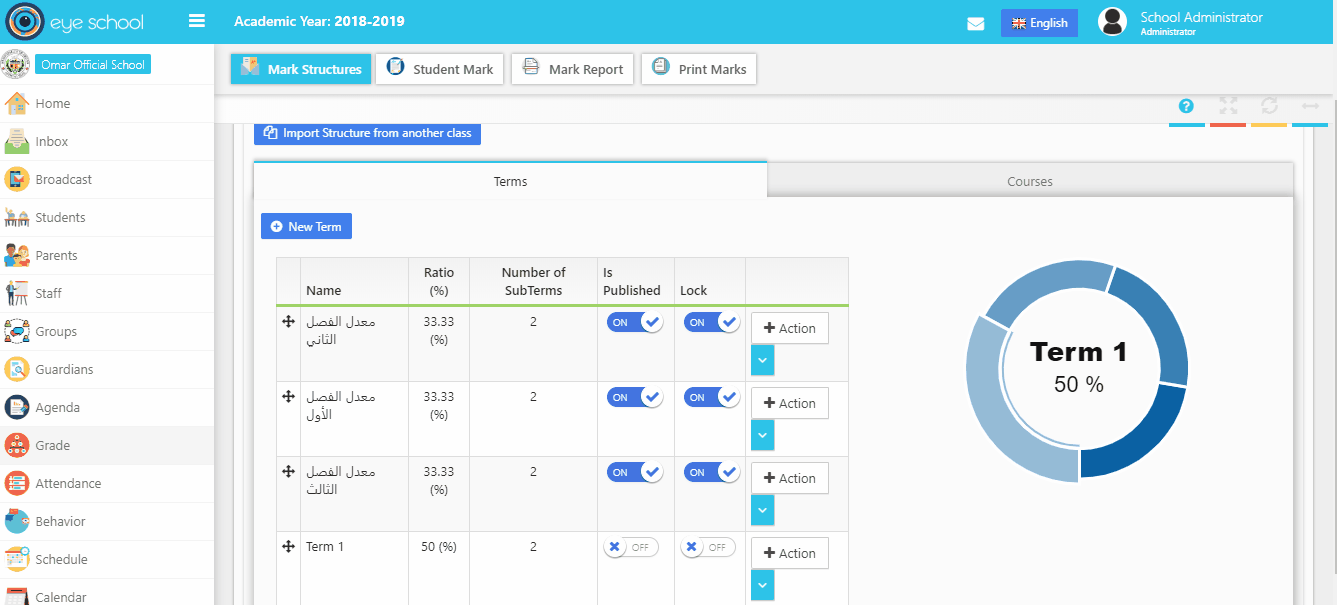
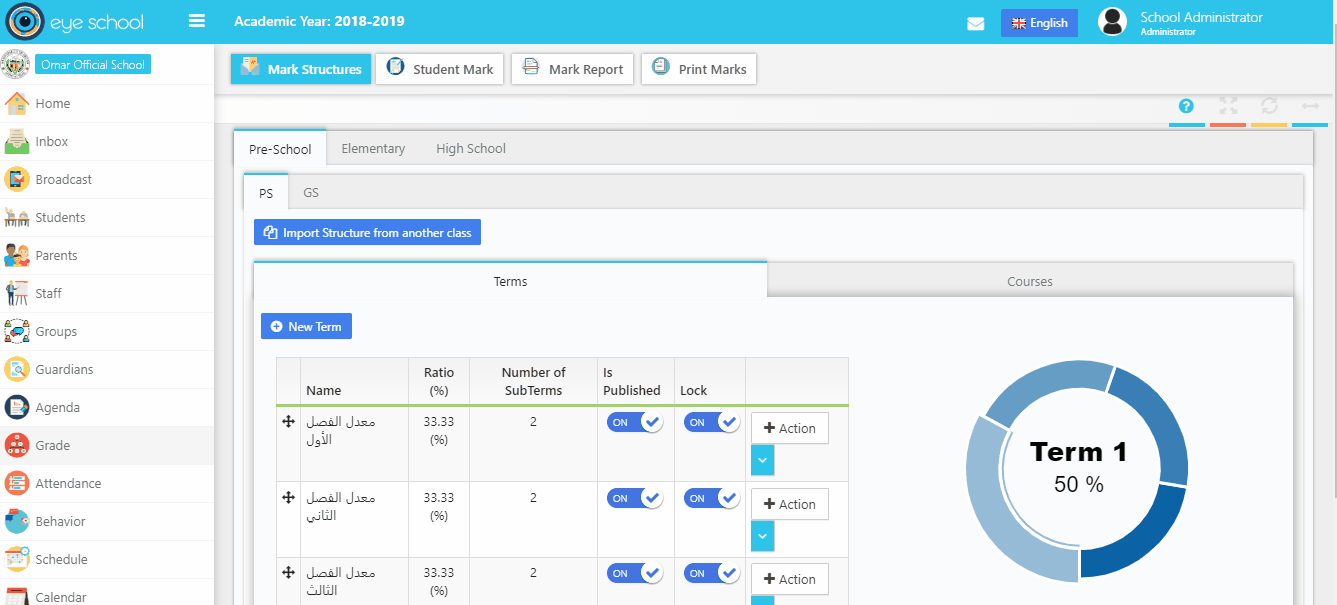
3- Import structure from another class:
It helps user to import the same structure in the class to different class, to do that first select which class needs to import data to it, second click on the button that selects the class which can select import all structure button or import terms or import courses from it. You can see an example below:
4- Publish terms:
It is used by supervisor to publish marks. That means disables all marks for a term and view it in parents account. After publish the marks parents can view their kid’s marks using mobile app in grades tab.
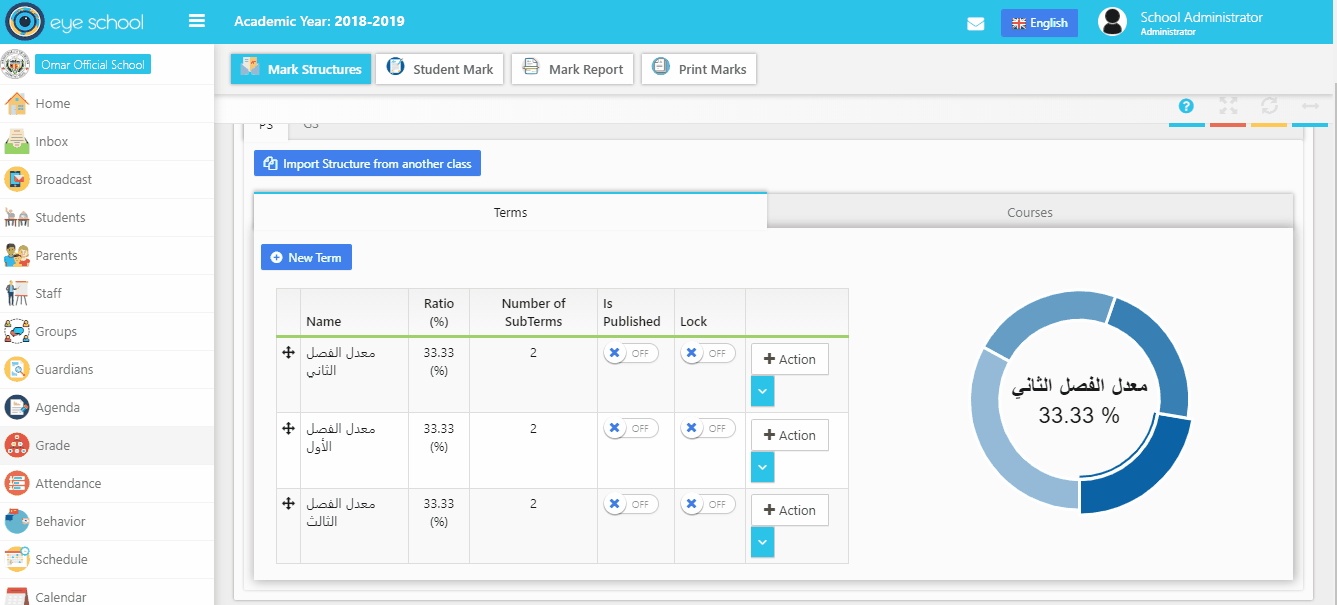
5- Lock terms:
It is used by supervisor to lock marks. That means disables all marks for the term that will not show in parents account. This option protects changing the data from any teach who added marks previously.
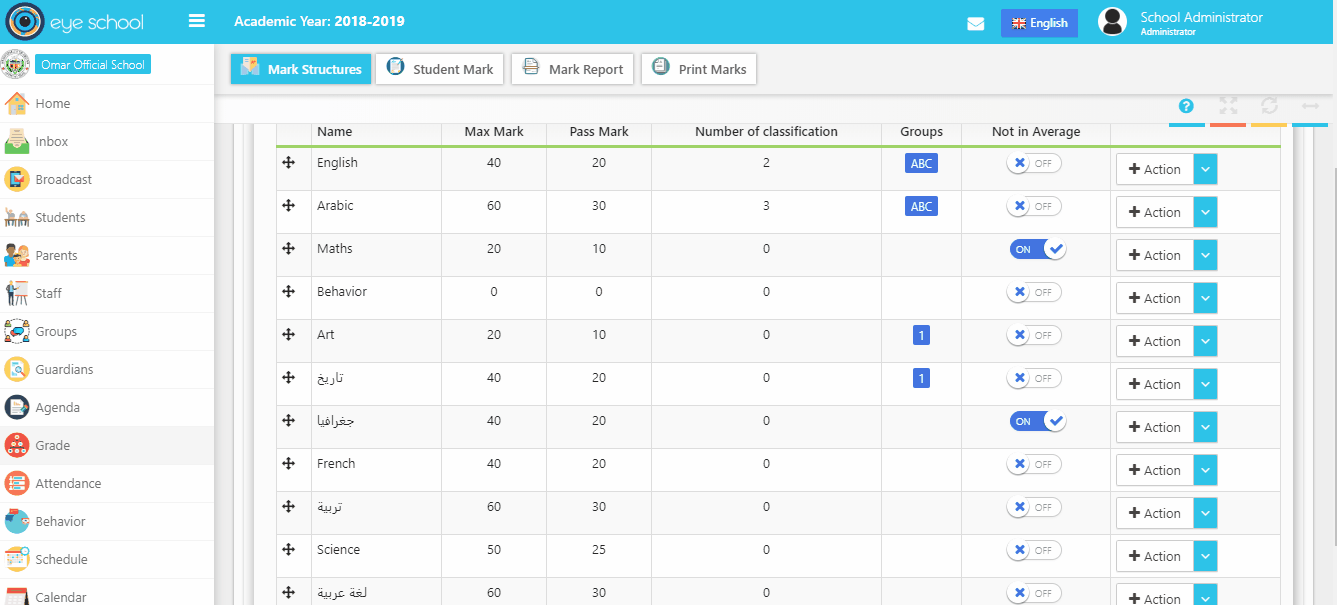
2- Courses Tab
This Tab contains structure of the materials in each class it creates new and edit each one, also it allows users to know the number of classification for each subject and to check if its included in total average or not.
Steps and cases how to use class mark structure page:
1- First step you should add material to it in each class using (new course) button, which displays new window to select the subject, with the ability to filter list of subjects and view list of materials from schedule or subjects.

2- You should add max and pass mark for each main subject and you can add classification for it and divide it into many sub subjects. The sum of max mark in each sub subject should be equal max mark of main subject.
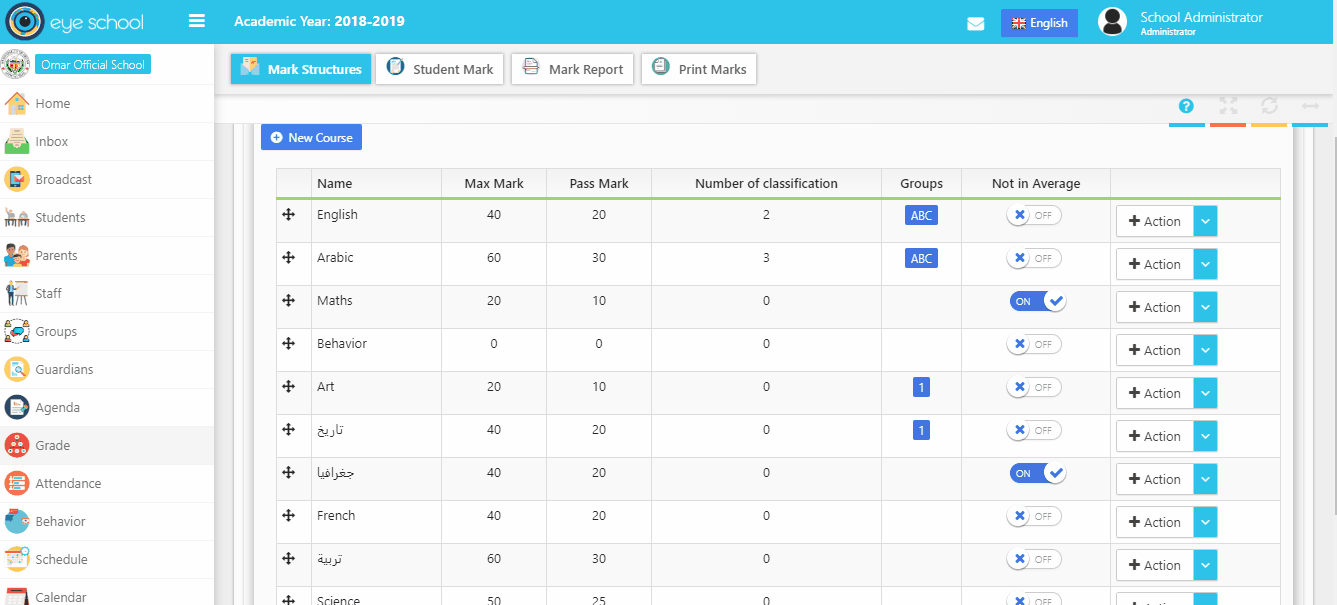
3- You can order the subjects as you want using the plus button next to each subject, also with ability to order each sub subject.
4- Import structure from another class:
It helps user to import the same structure in the class to different class, to do that.
First select which class needs to import data to it, second click on the button with select the class which can select import all structure button or import terms or import courses from it. You can see an example below:
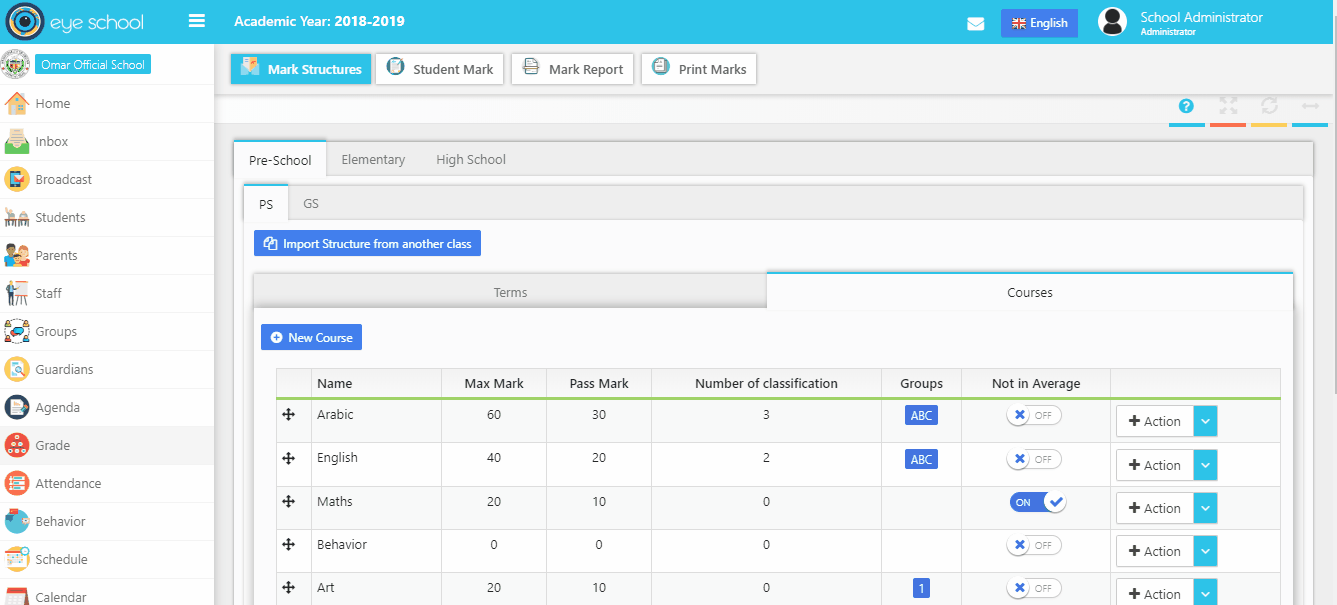
5- Excluded materials:
Some cases there are materials not included in total average in final academic year for example (behavior subject), so that you can exclude it from calculation process in print marks.
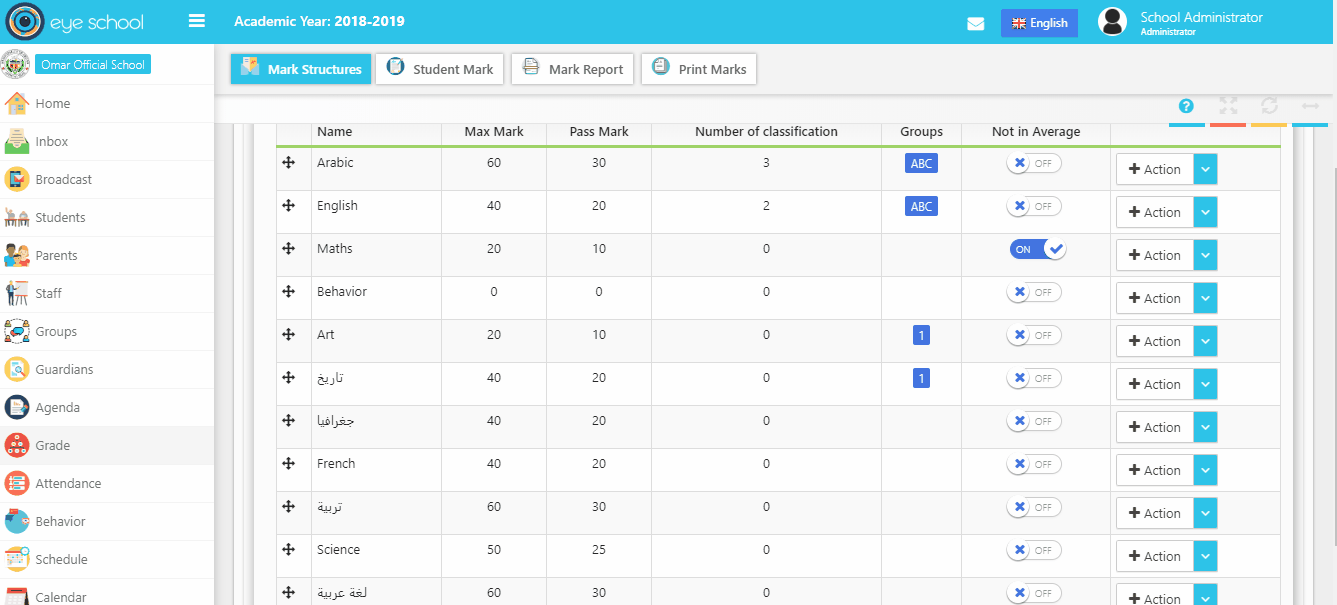
6- Groups material:
The system able to put subjects in groups used in print marks report to view each group of subjects in the marks template.
